Create a Lasting Tribute: Personalised Funeral Slide Show Videos Across the UK
At a difficult time, a tribute video or funeral slideshow can help tell the story of a life well lived. Using photographs, video clips, and meaningful music, we create personalised visual tributes that honour your loved one with care and dignity.
Commemorate your loved one’s life with a beautiful tribute video, hand-crafted to reflect their unique story.
At your most difficult time, we help you celebrate cherished memories through custom funeral tribute videos. Our service is trusted by families across the UK for its personal touch, care, and convenience.
Exclusive At-Home Photo Scanning: Your precious photos never leave your side. We’ll visit your home (or chosen location) to scan them safely. See how our photo scanning works.
Why Families Choose Our Tribute Videos
Truly Personal: Every video is crafted from your selected photos and clips, set to music that holds meaning for your family.
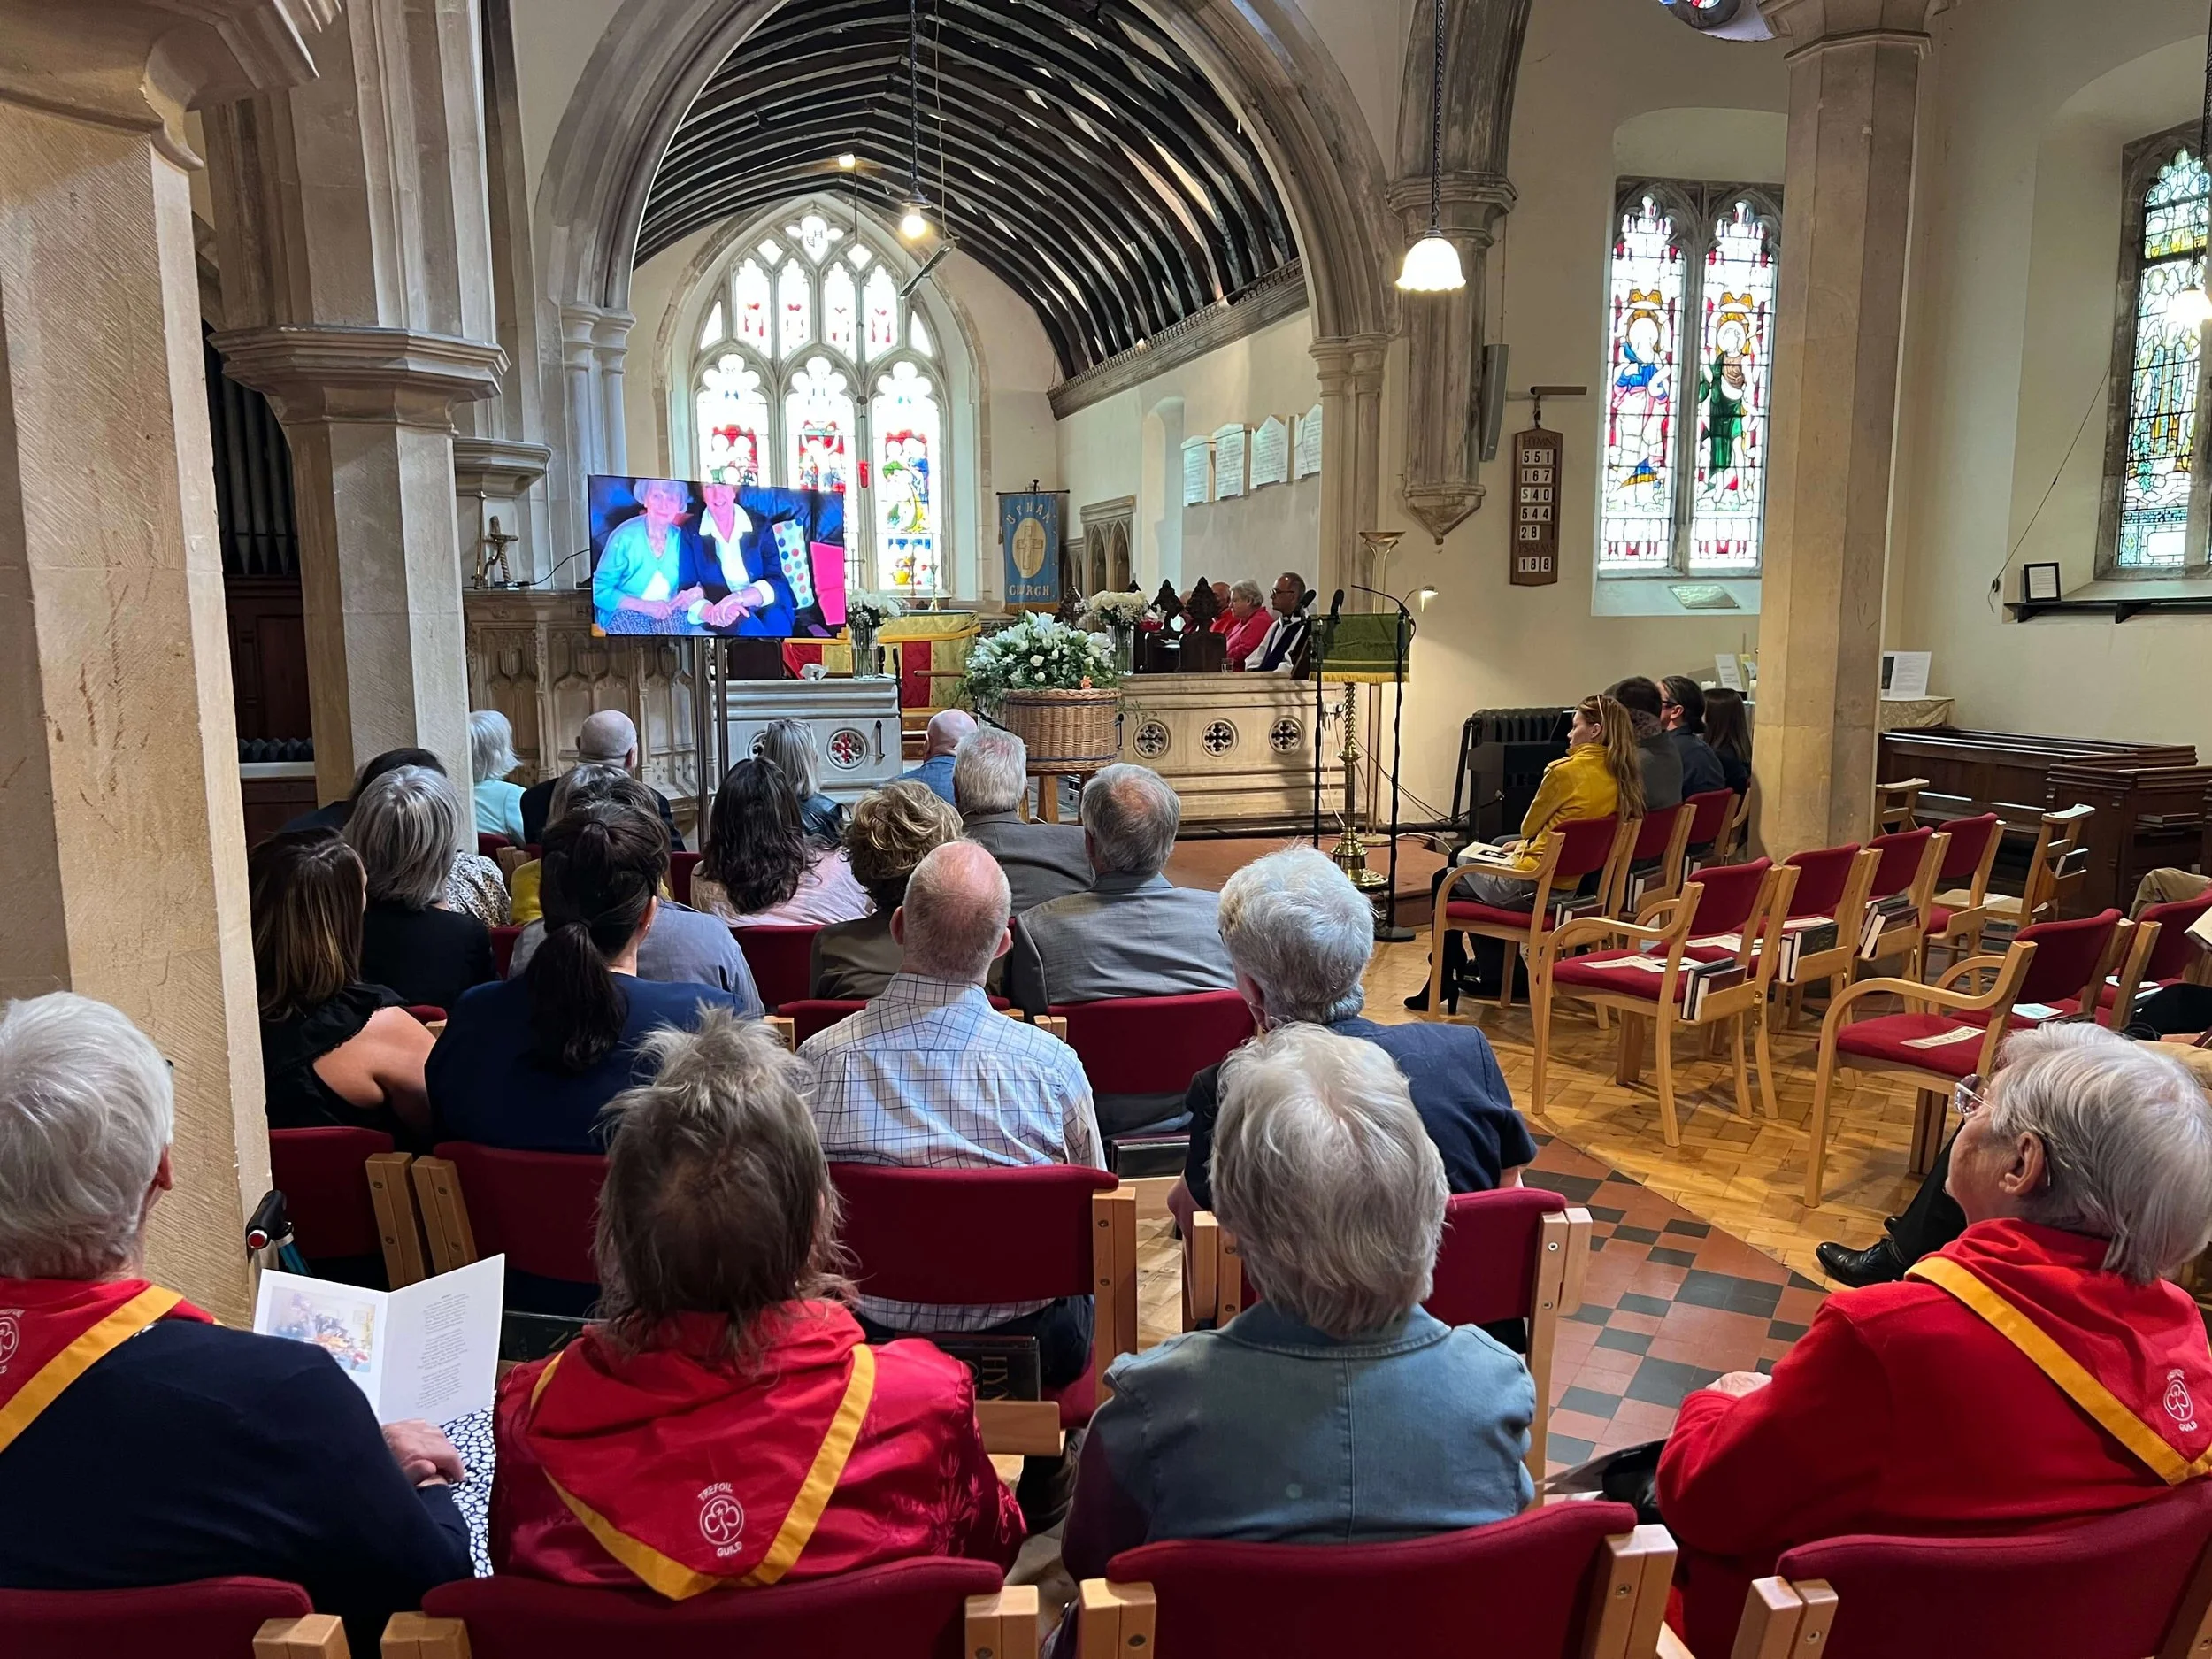
Stress-Free AV Support: We handle all technology—large TVs, projectors, and setup for crematoriums, churches, or any venue.
Easy Process: Upload your images (or let us scan them), pick your music, and relax while our editors create a touching tribute.
Shareable & Lasting: Download your video to keep and share, or display it at the service or wake.
How It Works
Contact Us: Reach out for a free, no-pressure conversation.
Share Your Photos: Upload or schedule our mobile scanning.
Choose Music & Title: Tell us your preferred song and tribute wording.
We Create: Your video (approx. 4 minutes/50 photos) is handcrafted—longer options available.
Review & Approve: Preview your tribute. One round of changes included; more for a small fee.
Play & Share: Download for personal use, or let us handle AV setup at your event.
No-Surprise Pricing: All costs are confirmed before we begin. Work starts only after payment—no hidden fees.
“Thank you so much for creating this amazing video. Watching it back, I was moved to tears—it was so beautiful. We will treasure this forever.”
— Sarah, London
Rated 5 stars by families across the UK.
Check Availability – Most slots fill within 24 hours
Contact us now to reserve your date or discuss your ideas:
Call +447766 754944
Text +447766 754944
Email info@funeral-av.co.uk
See Our Work
View examples of our funeral slide show videos for inspiration.
A Personal Touch, Wherever You Are
Serving the UK’s diverse communities, we understand the needs of local churches, crematoriums, and venues—from London to rural villages. We guide you every step, so you can focus on what matters most.
Funeral AV – funeral slideshow, tribute video, memorial photo slideshow, celebration of life slideshow, and more.
Professional On-Site AV Support
We provide full technical support on the day, including large TV screens or projectors and setup at chapels, churches, or other venues.
Quick Answers – We Reply in Minutes
Text, Email, or Call now to check availability
Phone: +447766 754944
Text: +447766 754944
Email: info@funeral-av.co.uk
Create a lasting tribute with Funeral AV: funeral slideshow, funeral tribute video, funeral photo slideshow, memorial slideshow video, tribute video for funeral, celebration of life slideshow, and funeral video with photos and music.
Funeral & Memorial Visual Tribute - Slide Show Video
-
“The tribute video perfectly captured our mum’s personality. The process was simple, and the team were incredibly supportive. It made the service so special.” — The TV you supplied in the Chapel was amazing, Thank you , Claire, Oxford,
“Watching the slideshow brought back so many wonderful memories. Everyone at the service commented on how beautiful and heartfelt it was. Thank you for making this possible.” — James, London
“I can’t thank Funeral AV enough. They took our photos and music and created a tribute video that truly reflected our dad’s life. It was touching and professional from start to finish.” — Sarah, Birmingham
“The team were kind, patient, and professional. The finished tribute video moved everyone to tears and gave us a keepsake we will treasure forever.” — Mark, Leeds
“The funeral slideshow exceeded our expectations. The editing was seamless, the music was perfect, and it felt very personal. Our family felt comforted seeing our loved one remembered in such a beautiful way.” — Emma, Bristol
“Living in London, we needed someone who could handle everything. Funeral AV scanned our printed photos at home and created a tribute video that was perfect for the service. Simply wonderful.” — Priya, London
“The AV setup was flawless at the Chapel. Everyone could see and hear the slideshow clearly. It added such a personal touch to Mum’s farewell.” — Tom, Winchester
“Even though we’re in Sydney, Australia, Funeral AV guided us every step of the way. The tribute video we received was professional, moving, and allowed our family to share the service online.” — Alice, Sydney, Australia
“We live in Auckland, New Zealand, and wanted a slideshow for Dad’s memorial. Funeral AV made it easy to send photos digitally, and the finished video was so beautiful. Thank you for helping us celebrate his life.” — Liam, Auckland, New Zealand
“The photo scanning service was a lifesaver. We had old prints we were worried about, and now they’re preserved in a stunning tribute video that our whole family can enjoy.” — Sophie, Portsmouth
“I’ve just finished watching the tribute video… it’s so beautiful. I just stopped crying. Thank you so much, Darren. X” — Olivia, Croydon
“I can’t stop thinking about the slideshow. Every photo, every song… it brought back so many memories, and I cried, but in a good way. Thank you for helping us remember him so perfectly.” — Mia, Brighton
“Watching the tribute video at the service was overwhelming. Tears, laughter, and so many memories — it captured Mum exactly as she was. Forever grateful.” — Charlotte, Portsmouth
“I wasn’t sure what to expect, but the finished video left me speechless. It felt like Dad was with us again, and I cried so much, but it was beautiful.” — Ethan, South London
“It’s perfect. The music, the photos, everything. I watched it twice already and cried both times. Thank you for making this for our family.” — Isabella, Surrey
“I didn’t think I could watch it without breaking down completely… but it was comforting. Every moment felt personal, and it really honoured her life.” — Aria, London
“Even my dad, who rarely shows emotion, was moved to tears. You’ve created something truly special. We’ll treasure it forever.” — Zoe, Sydney, Australia
“The tribute slideshow was beyond words. I laughed, I cried, and I felt like my brother was there with us. Thank you from the bottom of my heart.” — Noah, Wellington, New Zealand
“We had no idea how emotional it would be. Watching the video, seeing all our memories come together… it was the most touching part of the service. Truly grateful.” — Grace, Hampshire
“I can’t thank Darren and the team enough. It was personal, heartfelt, and so beautifully done. I cried, smiled, and felt so much love watching it.” — Lucas, London
Why Choose Our Funeral Slide Show Videos?
Personalised and Meaningful
Every tribute video is created using your chosen photographs and music, carefully edited to reflect the personality and life of your loved one.
Photo Scanning at Your Home
If you have printed photographs, we can scan them at your home or chosen location, so your memories never leave your side.
Click here to learn more about our photo scanning service
Professional On-Site AV Support
We provide full technical support on the day, including large TV screens or projectors and setup at chapels, churches, or other venues.
Simple, Stress-Free Process
You can upload digital photos or use our scanning service, choose the music, and leave the editing to us
How the Process Works
How the Process Works
Get in Touch
We’ll talk through your ideas and answer any questions.Share Your Photos
Upload images securely or arrange home photo scanning.Choose Music and Title
For example, “In Loving Memory of…”We Create the Tribute
Most tribute videos are around 4 minutes long using approximately 50 photos.Review and Approve
Minor adjustments are included.Play and Share
Download your video or let us manage playback on the day.
A Lasting Keepsake
Your tribute video is delivered as a high-quality downloadable file that can be:
Shared with family and friends
Kept as a personal memorial
Played during the wake or celebration of life
All the audio-visual equipment you need for the day
Funeral AV doesn’t just create your tribute video — we also provide and operate all the audio-visual equipment you need on the day. You can focus on remembering your loved one while we handle everything.
Playback during the service, wake, or celebration of life
Check our availability - contacting us couldn’t be easier - We reply in minutes
-
A funeral tribute video is a personalised slideshow or video that celebrates a loved one’s life using photographs, video clips, and meaningful music. It provides family and friends with a way to honour memories, share stories, and create a lasting keepsake.
-
To create a funeral slideshow, select meaningful photos, arrange them in order (chronological or thematic), and pair them with music that reflects your loved one’s personality. Professional services, like Funeral AV, can help edit, scan printed photos, and produce a high-quality video.
-
Most tribute videos include around 40–50 photos, but the number can be adjusted depending on the video length and the moments you wish to highlight. Including childhood, family, and milestone memories helps tell a complete story.
-
Choose music that was meaningful to your loved one or fits the tone of the service. Soft instrumental, classical, or gentle contemporary songs are popular choices and help create a respectful and emotional atmosphere.
-
Yes. Short video clips can be combined with photos to make the tribute more dynamic and personal. Professional editors can seamlessly integrate both formats with music for a smooth, emotional result.
-
Most funeral tribute videos last around 4–5 minutes, but they can be shorter or longer depending on the number of photos and clips. The length can be adjusted to fit the service schedule or your storytelling needs.
-
Yes. Services like Funeral AV offer home or on-site scanning of printed photographs, ensuring that cherished memories are preserved digitally and included in the tribute video.
-
While it’s possible to create a tribute video yourself, professional help can save time, reduce stress, and ensure a high-quality result. Professionals handle photo editing, music syncing, and technical setup for display at the service.
-
Tribute videos are typically played during the service, either before, during, or after the eulogy. They can also be shown at a wake or celebration of life. Professionals can advise on the best timing based on your service format.
-
Yes. Tribute videos can be provided as high-quality downloadable files, allowing family and friends who cannot attend to view and honour your loved one remotely.